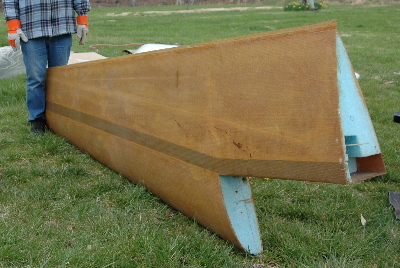
LEFT— Here is a wings as it arrived with the kit. In the picture, you can clearly see that it has been skinned, but no control surfaces have been cut nor is there rigging of any type.
On August 4, 2007, the wings were pulled out of storage and laid out for work on the saw horses. After watching the Videos a number of times, Rob started cutting and trimming.
 Initial trim work involved cutting the trailing edge to a nice straight edge and flox filling the trailing edge. Holes were then made in the upper and lower surfaces where the wing attach bolts would be located. This is to allow access so that we can put the bolt through the wing attach points and then through the spar.
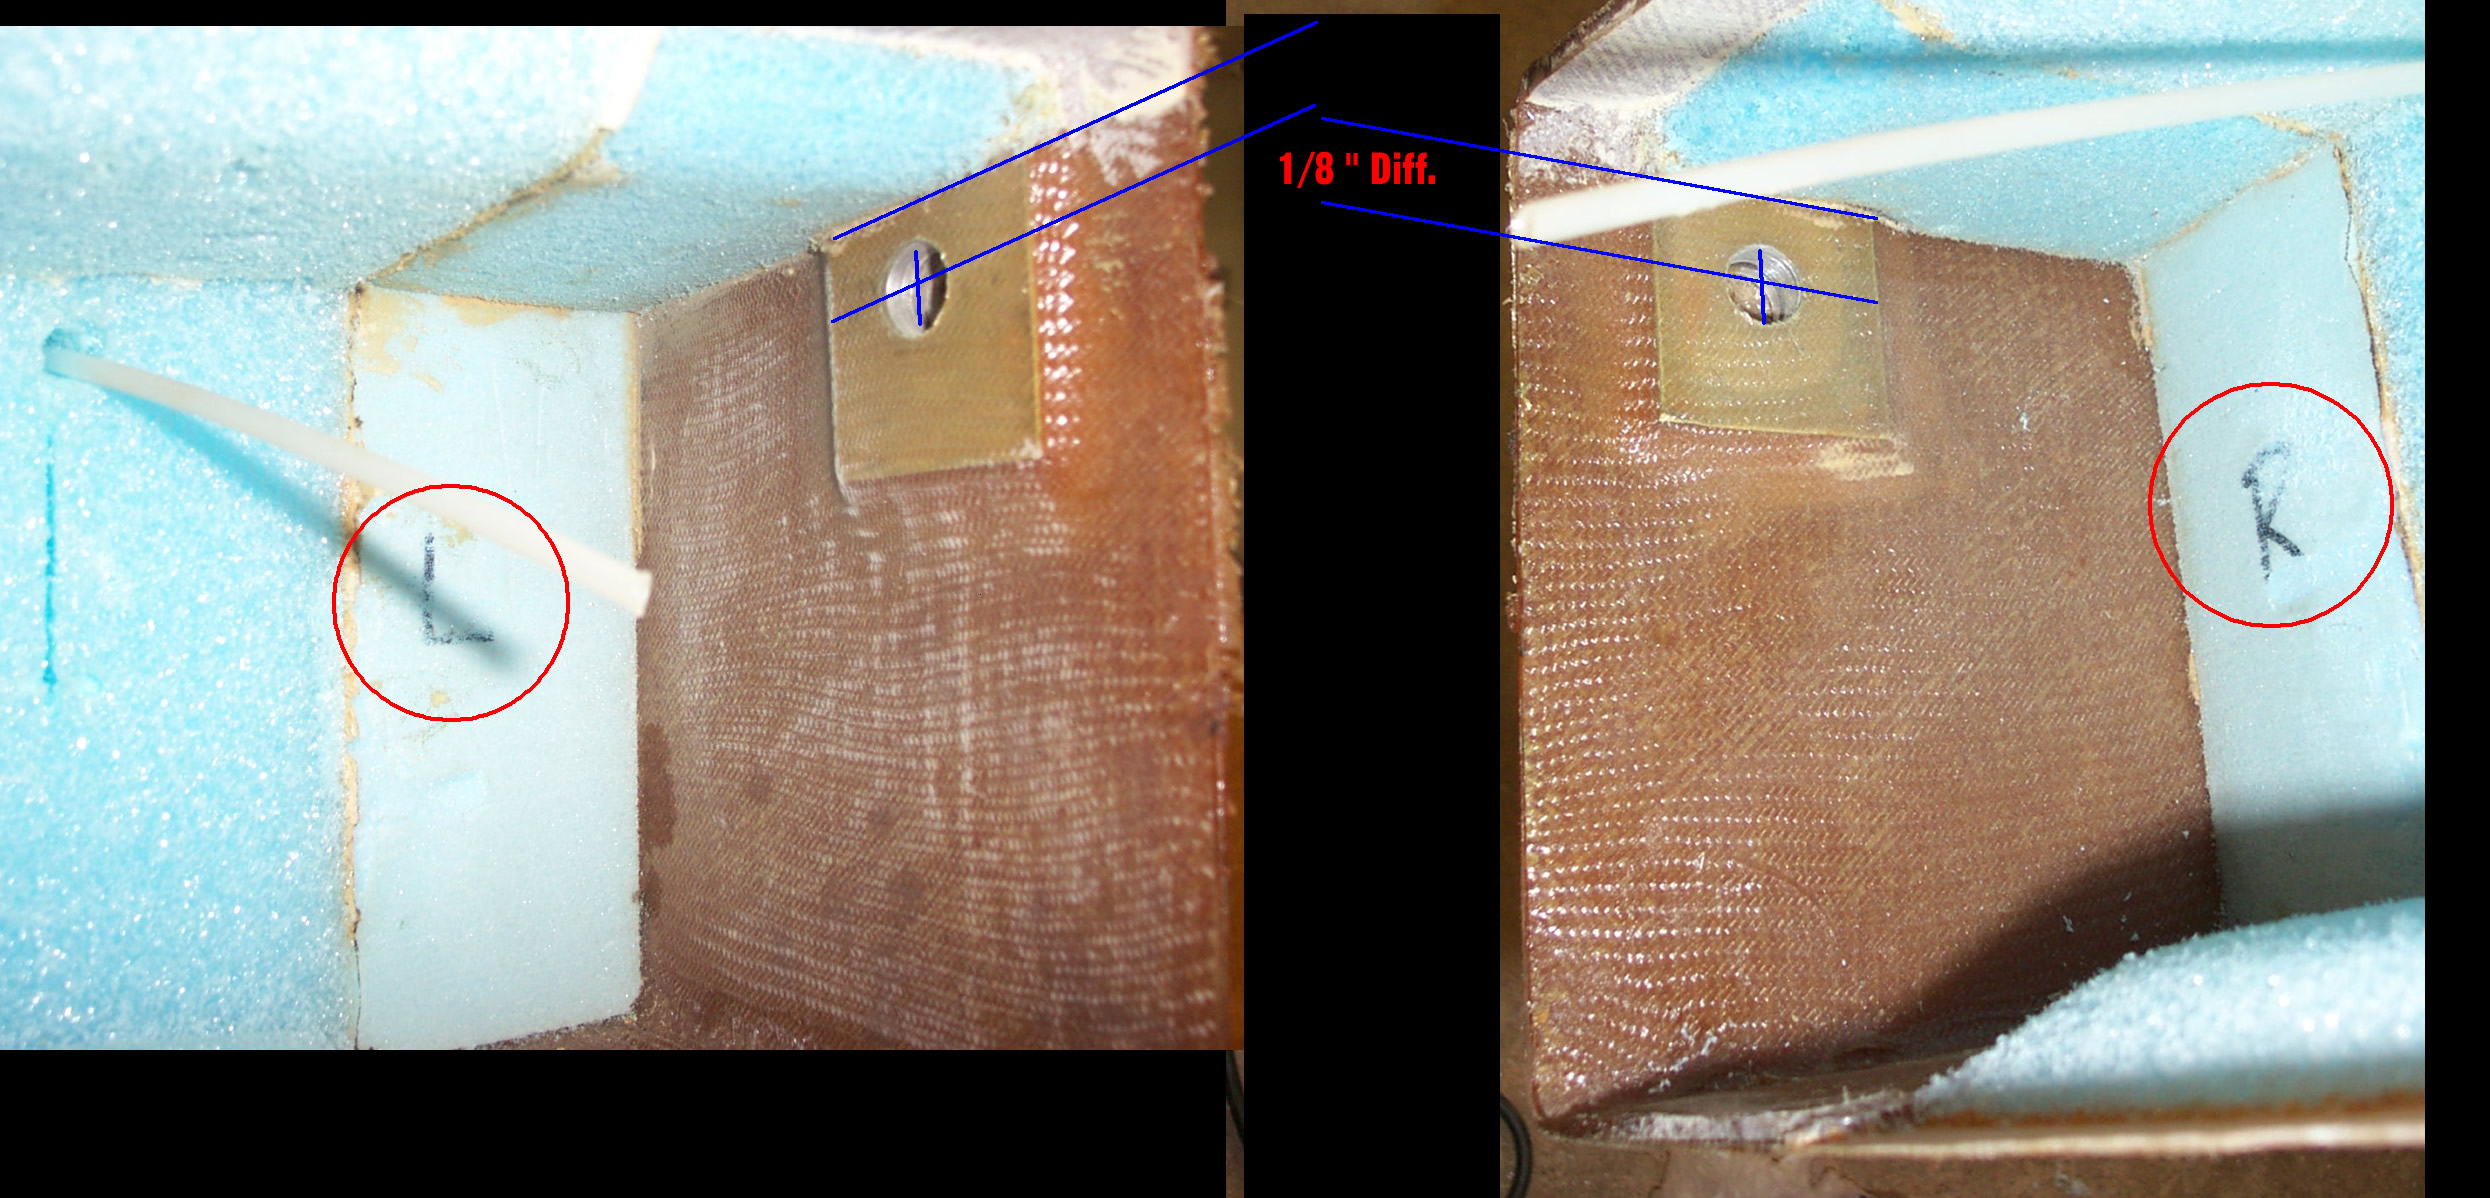 Rob quickly noticed that one of the holes that allows us to mount the wing to the spar appeared to be about 1/8 inch off center with the hole on the opposite wing. PANIC!! Time to check the spar and see if those holes were off by that same 1/8 inch. Sure enough, 1/8 difference on the spar also. We can only conclude that the wing jigs the Jeff Russell used are laid up that way; not sure why as it would take a real idiot to attempt to put the wings on backwards.
To view all the pictures of the wing construction up to this point, click here.
Sanding Pads— With lots of sanding anticipated, we attempted to get those 3M Marine boards that are so popular. But, after finding it difficult to purchase them and then have a local paper source, we decided to make our own. Using a 2" thick counter top scrap, we cut 48" sections 4" wide and then used Weldwood contact cement to attach 24 & 50 grit sandpaper. For a "Flexible" sanding pad, we used a 1.5" thick piece of PVC fencing stock. We cut the PVC to about 30" long. This will allow the PVC to flex about 1" up or down between ends with a just a little resistance.
 9/28/2007— Time to begin the fun stuff! At right you can see our wing lying upside down on the saw horse. We need to get the Aileron's cut cut out soon. Thus, we have to have our wing shape all finished. Micro fill has been added and we're starting to sand using 4 Ft. boards with 24 grit paper on them.
If you have never visited Wayne Hick's page on finishing, do so. This is one of those MUST READ sites. He has done an excellent job of documenting all the hurdles you will face when sanding your wings. In fact, let me encourage you to read through his whole site. This guys is just a wealth of information. A word to the wise should be sufficient!
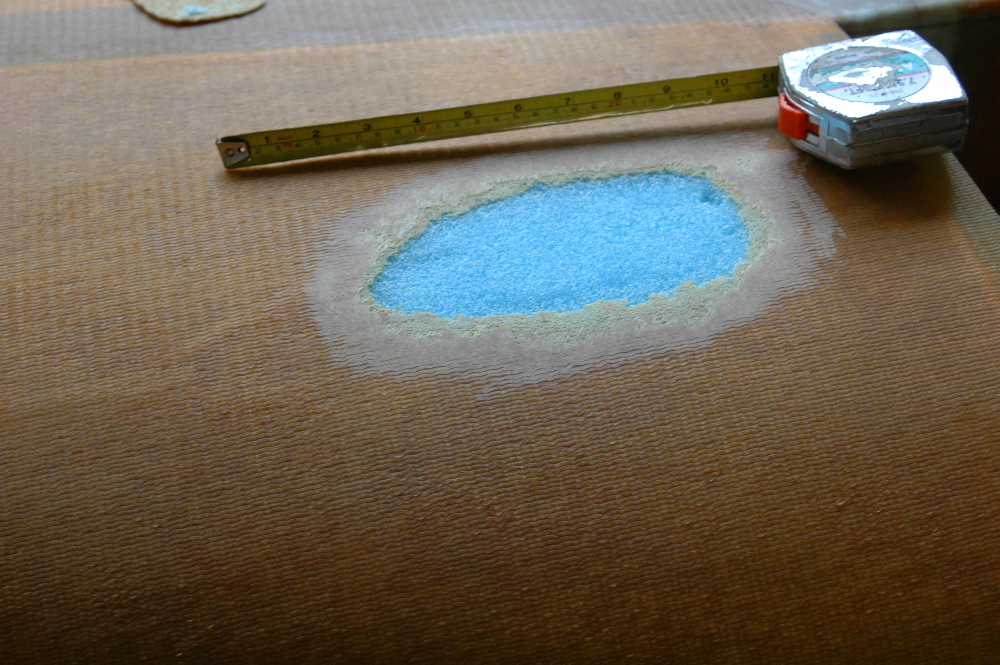
Problems: Dip in wing! While micro-ballooning the wings, we noticed an area aft of the bolt holes that was a rather deep (3/8 x 18) dip in the wings. Click on the picture ar right to see the area affected. Does one fill a hole that's 3/8" deep and the diameter of a wastebasket with microballons? Time to all Al again! Click on the picture above to see this problem in more detail. Jeff Russell responded to our question:
...the wing has it largest cord on the T.E. at the root and then changes shape again at the end of the strake. It then has a clean shape to the T.E. of the wing. You do not want to want to fill out that area. There should be a line from the T.E. to the end of the Strake or main spar. Most people lightly fill so there is not a (line) that you can see.
Look at the hotwire wing templates and you will see that this was a shape change to dress out the strakes at that area...
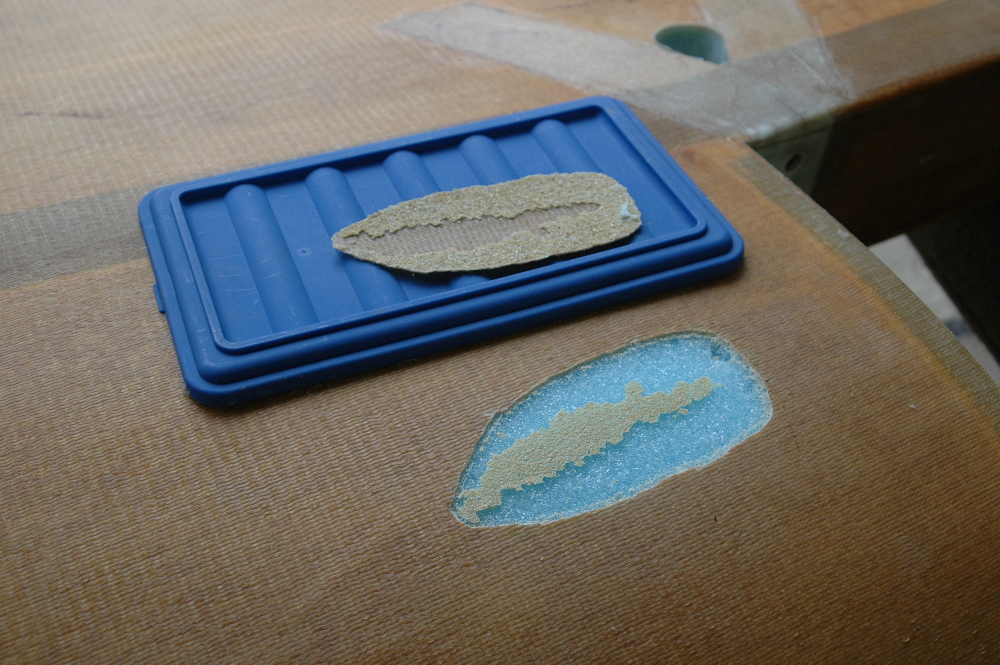
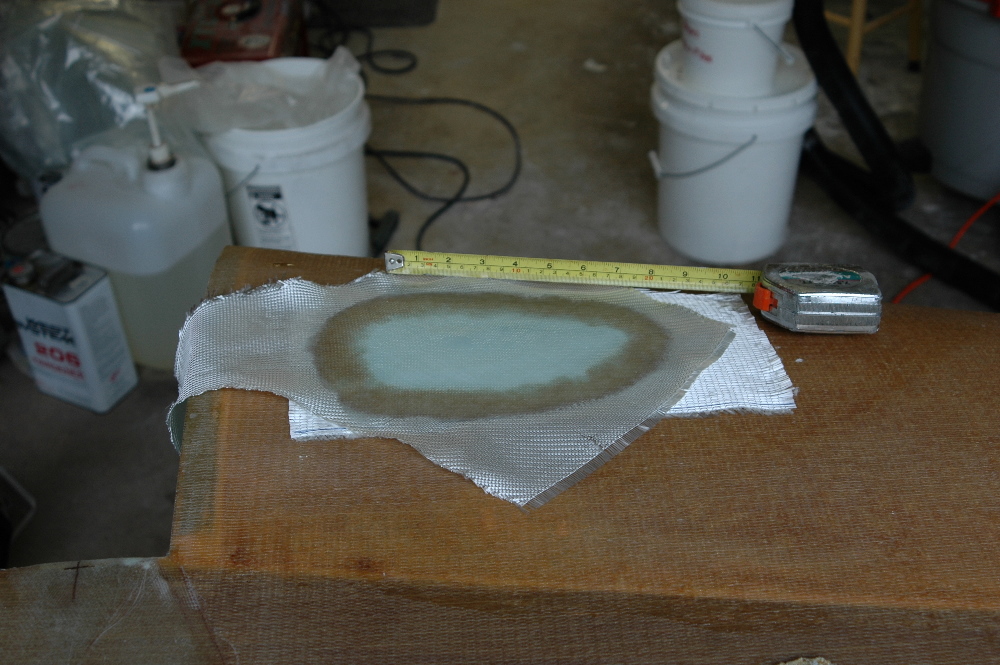
Problems: Delamination and Ding! While we were prepping the upper surface of the right wing, we found a small area (3 x 2 inches) that was dented and seemed to have delamination. So, we decided to make repairs.
 |
 |
 |
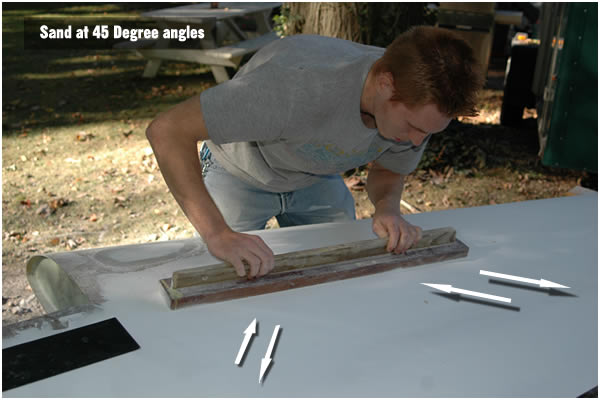 Wing Sanding technique This is probably a good time to remind you of the correct sanding technique when shaping your wing surface. As seen in the photo at right, Roger is sanding one of the wings. The arrows indicate the directions to sand the wing. Always hold the sanding board as shown below while sanding. Roger is using a 3 foot home made board with some 50 grit paper on it.
In this picture, you can see near the left on the leading edge the completed repair area for the sequence of pictures above.
Epoxy? We used MGS Systems for all structural stuff on the aircraft and West System for filler applications.

| Landing Light |
As it turns out, finding a suitable landing light is turning out to be a real challenge. Richard has been searching the internet for something real bright, but with minimal heat. He found a source for a LED landing light, but has been unable to make contact with the sellers. Possible Sources: http://www.strobesnmore.com/ |
|
| Tie Down Points |  Hidden Tie Down Attachments are the preferred way to deal with this. However, if this is not an option, then we just put some type of eyelet in. We must be able to protect the A/C from strong winds. Hidden Tie Down Attachments are the preferred way to deal with this. However, if this is not an option, then we just put some type of eyelet in. We must be able to protect the A/C from strong winds. |
|
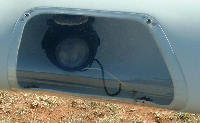 We're thinking that we want to incorporate some type of landing light in the wing. Something like one sees in this picture.